Facebook is to a small business what food is to us. We can survive without food for a few days, but not for long. The same goes for a small business—it can remain functional for only some time without a Facebook account.
If you are a small business owner and contemplating a Facebook account, stop contemplating. Instead, do what you must do—create a Facebook account. After all, which other medium gives you an opportunity to reach out to about 750 million users for free?
A Facebook account alone, however, cannot generate interest about your business. For this to happen, you need to do many things, and must do all of them right. The first thing you must do after your account is established is to create an impressive Facebook page for your business.
Creating an eye-catching Facebook business page is no rocket science, but it does require some planning and effort. Read on to know how to create a fabulous business page in 3 simple steps.
A 3-step process for creating an eye-catching Facebook page for your business
1. Create your profile
It is imperative that you create your personal profile before you establish a fan page. As the business fan page is created by you, it can only be accessed through your account. In other words, the business page has no separate login.
Many people are apprehensive about putting their personal information alongside their business information. As far as a Facebook account is concerned, such fears are uncalled for, because the personal information and business information are listed separately. The profile page belongs to you—the person—and, as such, you should put only your personal information on it. The business fan page, on the other hand, is where you will interact as a business entity, and so must have information related to your business only.
2. Create a Facebook page
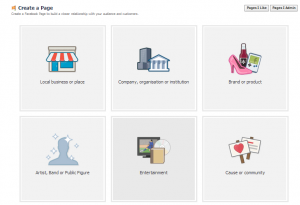
After you’ve created a profile, open it, and then click the Pages header. Next, click Create a Page to view the different page types, such as Local Business or Place, Brand or Product, Company, Organization, or Institution, Entertainment, Artist, Band or Public Figure, and Cause or community.

Create Facebook Page
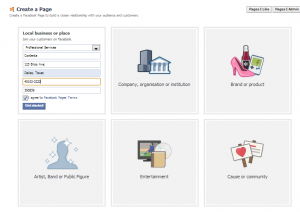
Select the right type of page, and fill out the necessary details. After you’ve filled out the requested fields, which are different for different pages, check the box next to I agree to Facebook Page Terms, and click Get Started.

Get Started
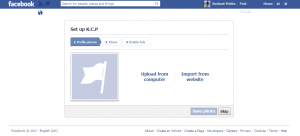
The rest of setup process is simple and easy. All you need to do is follow the instructions on your screen. If you wish, you can skip certain steps and fill them later. You can also leave a few steps blank. However, it will be best if you fill out all the steps, because the more information you will share about your business, the more people will know about it.
3. Give the relevant information
Facebook will ask you to provide the following information about your business:
- A logo (profile picture)
- Details in the About section (provide basic information about your business and URL of your official website)
- Contact information

Enter Information About your Business
Certain applications are attached to your page by default. These include Links, Photos, Notes, Events, and Video. Although you cannot remove them, you can tweak the settings to make them disappear from the left-side navigation.
You can seek help of the right kind of apps to make the Wall of your Facebook page more appealing and to keep it up-to-date. For instance, if your company has a blog, with help of a Facebook app, you can link your blog with the wall of your Facebook page. This way whenever you will publish a new post on your blog, it will automatically be added to the wall of the Facebook page.